First Time Makin’ Paper Clay
Howdy! Decided to try my hand at making my own paper clay. I’ve been using the store-bought kind but it is quite expensive. Looked up a couple of you tube videos and went for it today. Got this recipe from: http://www.ultimatepapermache.com/paper-mache-clay.

I am very happy with my first go at it. I added a couple of things to make it last longer, kosher salt and Cream of Tar Tar. Been using these in homemade play dough for years so thought it couldn’t hurt. I also watched: https://youtu.be/F4KLDqzQxBI. Some great tips from this guy. It could have been smoother, so I’ll work on that next time.
I wanted to make some more “boxes” for a project like this one which was a small wood box to begin with. But it is hard to find boxes just right.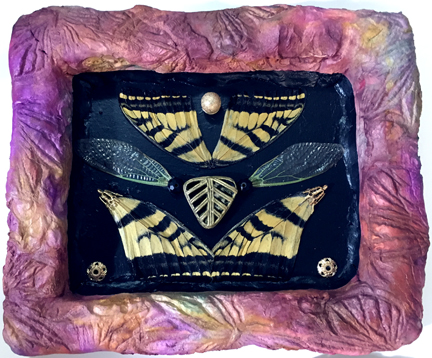
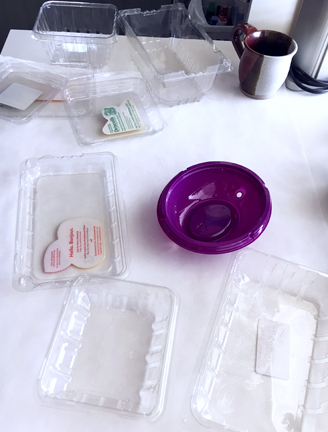 So I had this idea of making my own while washing my cherry tomatoes one day, thinking the size of the tray was just right. What if I build my clay around this “substrate”? So here I am, doing one of my favorite things… experimenting.

This is my first try. Added glue (Aleene’s Taky glue was great for this).

I quickly realized my screws were too short and not in very tight so I revamped that idea. By the time I got to the fourth one I realized that I had this clay on pretty thick, as I had almost used up all my clay. So I finally rolled it out to make it thinner and even. That seems to have worked well. 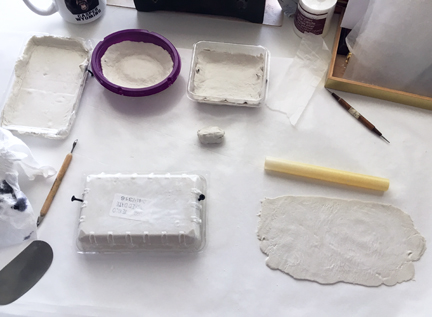
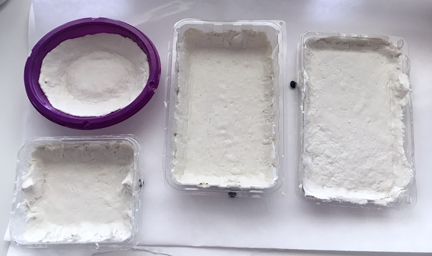
Just waiting for them to dry to see how strong they really are… TO BE CONTINUED!
Enjoy ~emm
Sally Fun
 This is Sally’s Eye.
 Sally’s Nose.
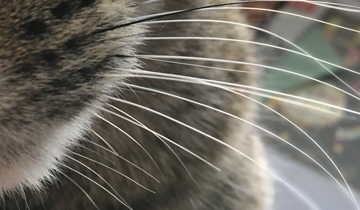 Yep, Sally’s whiskers.
 All close-ups from this photo that I’ve been having a lot of fun with. Sally Fun.
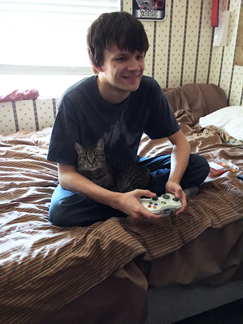
Now, I’m not the inventor of Sally Fun. Almost every morning my son Jackson comes out of his room claiming he’s late because Sally jumped up on his bed when his alarm went off and she made him stay in bed longer to cuddle, having Sally Fun. Sweet, I know.
MORE SALLY FUN
Enjoy! -emm
A Week in the Life of a Leaf
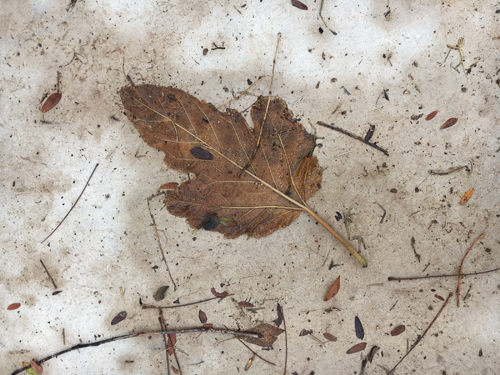
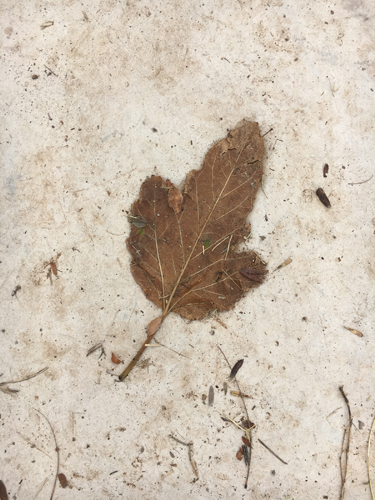
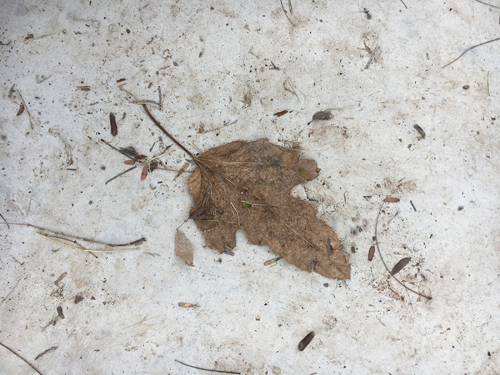

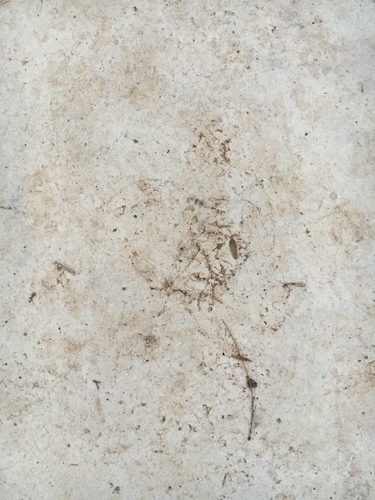
I miss my leaf.
BlueBerry Fantasy Film Wings by Emily M. Miller

Here are my BLUEBERRY Wings! Now showing at the Made In Clarkdale Corner Gallery. Along with a whole bunch more wings I’ve made in smaller form. And some other funky things. The show is called The ART of Mystery, Mysticism and Motion. Exhibit dates go through the end of October. See more details here: http://themmmshow.org/
 I love all the colors in this pair. It’s mostly made from Blue Nile Fantasy Film. There’s also Watermelon, Aurora, Krista’s Eyes, In the Glen, In the Forest and Spring Morning. See more here if you please: http://artglitter.com/retail/fantasyfilm.htm
 Here’s a close up of the back side. Awesome reflecting colors!
BTW, I have a mini-opening night on October 10th from 5-8pm. I’ll be demonstrating wing making with Fantasy Film.
Hope to see you there.
Enjoy ~emm
Makin Blue Wings
Furiously making a set of wings for the Mystery, Mysticism and Motion show coming up next Friday!
Go to: http://themmmshow.org/ for more info.

Just wanted to share. More Later.

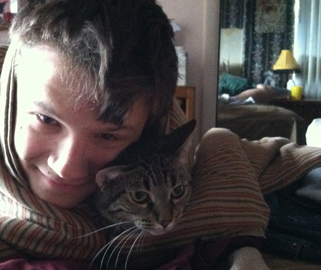
My sweet helper Sally. She thinks I’m crazy.
 Enjoy! Emm
Nicho by Emily M. Miller
Howdy! Good to be back. I’m going to share with you today one of my creations from Art Unraveled a couple of weeks ago. When I took the class I wanted to learn about Polymer Clay and I loved the Mexican Tin Shrine idea so here we are.
 This started out as silver. The door is glass, covered with Polymer Clay stamped designs. My teacher Laurie Mika, was wonderful. See her blog here: http://mikaarts.com/wordpress/
 Here’s the inside. I had created a polymer clay piece to put inside, but these wings looked so perfect I abandoned that idea. I’ll save it for another time. Recognize the glitter paper on the inside of the door???
 Here are my class mates with Laurie in front. Great time! I have lots of ideas on more shrines. Must make more!
 More on my other classes soon. Enjoy ~emm
Fantasy Film Angel Wings by Emm

Here’s a sneak peek at the Angel Wings I’ve created with Fantasy Film at Art Glitter. They are for The Rocks TV show that Art Glitter is a sponsor of. The wings will first be worn this Saturday night at their Halloween party by the producer of the show. And then they will be used on the show, which has just begun shooting, or will soon.

Side view. I’m VERY happy with how they are turning out. This is the first time I’ve envisioned how a design will look, and had it actually work out. Beautifully. Have a little more work to do. Almost done!

Here’s a shot without the flash. SO EXCITED. I’ll take more photos when done, some in the sun! And photos at the event. Stay tuned…!
Bug Coffins

My Newest Art Work inspired by a class I took at Art Unraveled by the name of Metamorphosis – Soldered Bug Coffins taught by Katherine England. Are you surprised? Are you shocked? I didn’t think so. Do you think I’m weird? Did you ever think I wasn’t weird…
When I was looking into the classes I wanted to take at AU this year I wanted to make sure I learned how to solder and cut glass. There were several interesting classes that fit the bill. The bug coffins class was at the same time as another one that I wanted to take so I spent hours debating with myself as to which other soldering one I should take. One day as I was walking around my art room, looking at all my trinkets, including my collection of cicada wings, dried lizards, a couple cicada specimens, a brand new beetle I’d just found that day and of course my dead hissing cockroaches (thank you Vicki), I thought… Really Emily, are you going to pass up this opportunity to spend 6 hours with other artists who are also attracted to dead bugs? A chance to freely embrace your inner um… my inner what I don’t know, I’ll figure that out later. But a chance to fit in, am I right?
Here’s the one I made in class: Annie

She is a smaller cicada I found in our yard I believe. These guys come out early in the summer. I don’t know if they grow into the larger ones, but here she is any way. Notice the glitter? Of course, bugs and glitter go great together! The background I used is from my Acrylic Paint and Stencils technique I experimented with in June, a ‘mistake’ nonetheless.
Here’s Bill, I finished him yesterday.
 He’s one of those guys that flies around real slow and haphazardly, you think he’s going to run into you. They love fruit, will bury themselves into a fig, so be careful if you pick one off a tree, cut it open first! I put a little bit of glitter (#79 Black, Ultrafine Art Glitter), on his mask and the background is from a glittered acrylic paint example I made a couple of years ago. Actually Lori found him for me right outside our door at Art Glitter.
Here are the backsides.
 You can see my glittered paper better on the backs.
So thank you Katherine England for giving me a real reason for keeping these bugs and oh yea, thank you for teaching me soldering and glass cutting! And the name of that other class I wanted to take…can’t remember.
 These are my first ever soldered pieces, just my moo cards under glass. The long one is my Momo who just passed away, the lower cat is Coachy, she used to pose for me long before Momo came along. And then what do I see in the photo above? Yes, it’s cicada wings…
Steampunk Roses


After you check out the projects here on the Art Glitter blog, be sure to head on over to the Want2Scrap blog and Graphic 45 blogs to find out what the talented members of their Design Team have in store for you today! Art glitter will be giving away 4 prizes! Just leave a comment on Art Glitter Blog by Sunday July 29th!
**********

Fantasy Film, Watermelon, Dandelion, In the Glen
Wire approx. 24 ga.
1-16” hole punch
Candle
Cutting board
Zacto blade or scissors
Designer Dries Clear adhesive w/ Ultrafine Metal Tip attached
Ultrafine Opaque Art Glitter: #351 Pink Diamond, #350 Butterscotch
Art Glitter Glass Beads: #802 Sunset (Sm), #804 Clover (Sm), #823 Transparent Auburn (Sm)
Frame to repurpose
Graphic 45 Steampunk Debutante Collection paper
-Fantasy Floral
-Mechanical Mind
Graphic 45 Chipboard Tag
-Olde Curiosity Shoppe Tags 1
Want 2 Scrap Nestabling
-Labels 24 White Pearls
Spray bottle with water
Matte board, scrap piece
E6000
 I started with an old frame, took the glass out and saved the picture for a later day. Then I tore some pieces of Fantasy Floral paper to lay across my frame. I sprayed the paper very lightly with water to make it pliable and glued it into place with DDC. I cut a piece of Mechanical Mind paper (the ‘backside’) and matte board to fit the frame and glued them together.

I already have Fantasy Film Roses directions on Art Glitter here… The ones I made today are just a touch smaller. And I used smaller gauge wire.

The trick with making these roses is not to melt too much away. It is really tempting to do, but you cannot get back what you melt away!

I assembled the flowers in the frame to see where they looked best and decided on a chipboard tag from graphic 45 as a focal piece as well. I felt as though I needed to bring more of my watermelon rose color back into the piece so I glittered the wind up image on my tag with Pink Diamond Art Glitter.

Then made Butterscotch dots around the tag. First I tried to match the little dots on the tag, but that didn’t go well and I decided not to worry about it!
Next I got my bling out from Want 2 Scrap. These white pearls fit my roses perfectly. I cut them out and placed them on some of the petals. When I placed the bling on the petals I paid more attention to arranging them in a pleasing manner than to matching the curve of the pearls to the petal. It worked perfectly. And the bling sticks to the Fantasy Film really well!

The rest is assembly. I glued my flowers down one at a time by wrapping their wire through the inside and around the edge of the frame with the backgound to help keep them in place. I used E6000 to glue them to the inside of the frame. I like using E6000 for this type of thing because it doesn’t set up right away and you can move the flowers around a bit till they are right. I just propped it up and let gravity help to hold the flower in place as it dried for about half an hour.

I put a small square of matte board behind my tag before gluing it down with DDC to give it some height.
At the last minute I decided I needed to add some Glass (no-hole) Beads to the frame. Ideally this step should have happened before I assembled it, oh well! I made sketchy lines along the lines of the roses, and beyond the edges of the torn paper with my DDC and sprinkled beads on. I love the textured look they give the piece. What do you think?
Stencil Stash Collage for Lori
As promised! Here is a 5 x 7 Collage I put together with some of my samples from my Dreamweaver Stencils experiments.

I have two examples here using Dreamweaver Stencil: LX7007 Leaves. The background is from my Stencils, Paint and Glitter post. Then the top piece is from my Stencils and Fantasy Film Melting post.

I found a nice frame in my stash that matched colors beautifully, and was damaged near the opening, perfect for covering up! So I took the glass out and started gluing in cardboard pieces to fill in the opening of the frame.

Here you can see the painting without any changes to it. As I realized later, this is the only photo I have of it in its first state. Beautiful as is!

Here I added a line, first drawn with a calligraphy pen. Then highlighted with my Designer Dries Clear Adhesive and #249 Woodberry, Transparent Ultrafine Art Glitter. I used the same method for the word “breeze”.
Next I added my melted Fantasy Film/Stencil piece. I used some 3-D Memory Zots to give it some height. A few findings to finish it off.

I gave this to Lori, my friend and co-worker at Art Glitter yesterday. (If you’ve ever called Art Glitter you’ve probably talked to the lovely Lori). Today is her birthday, have a good one Lori!
